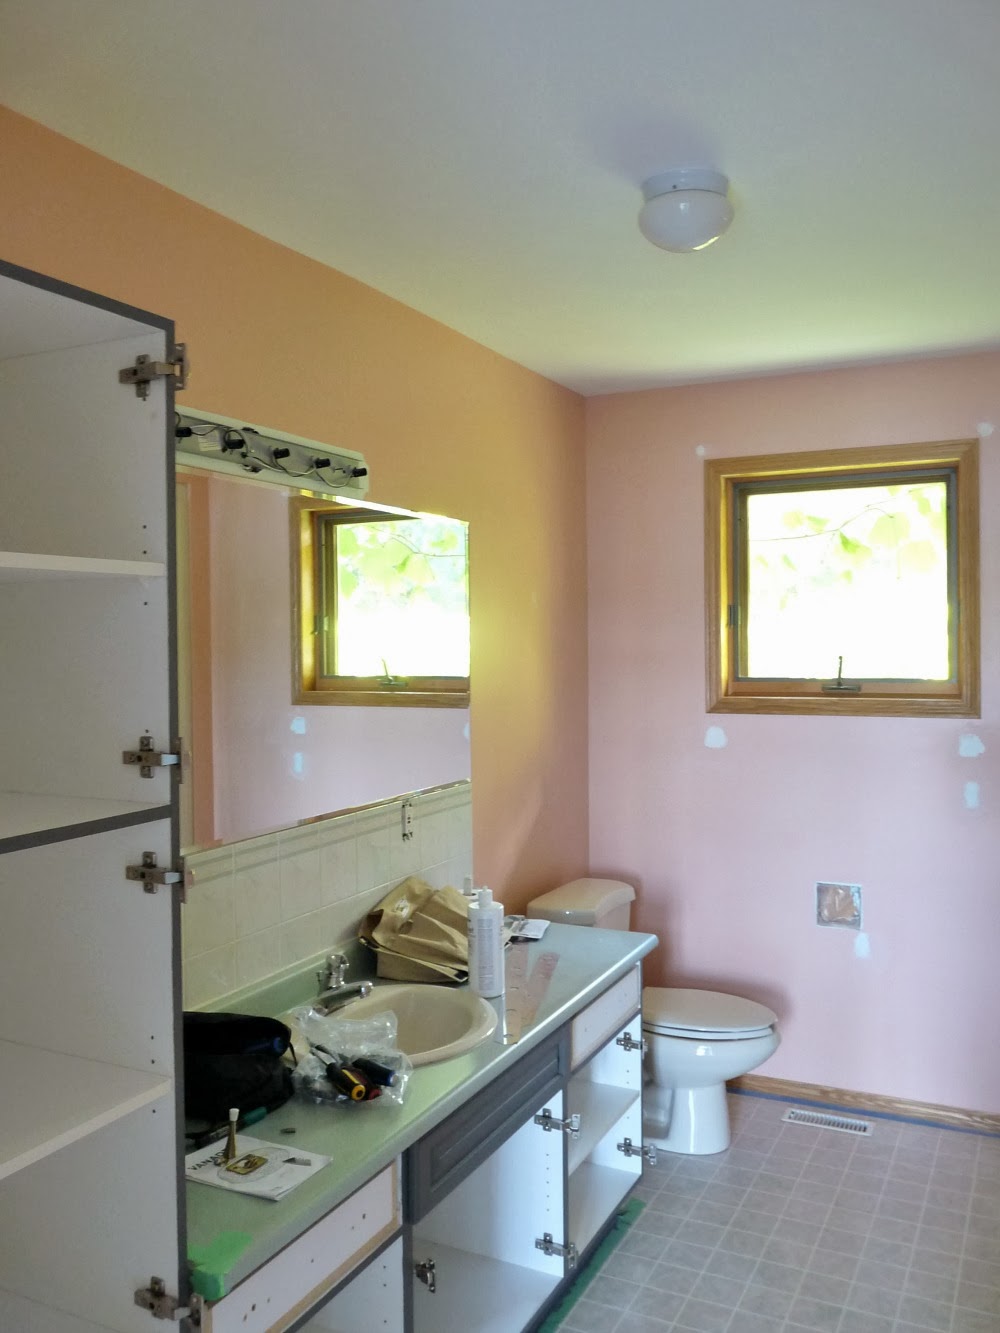
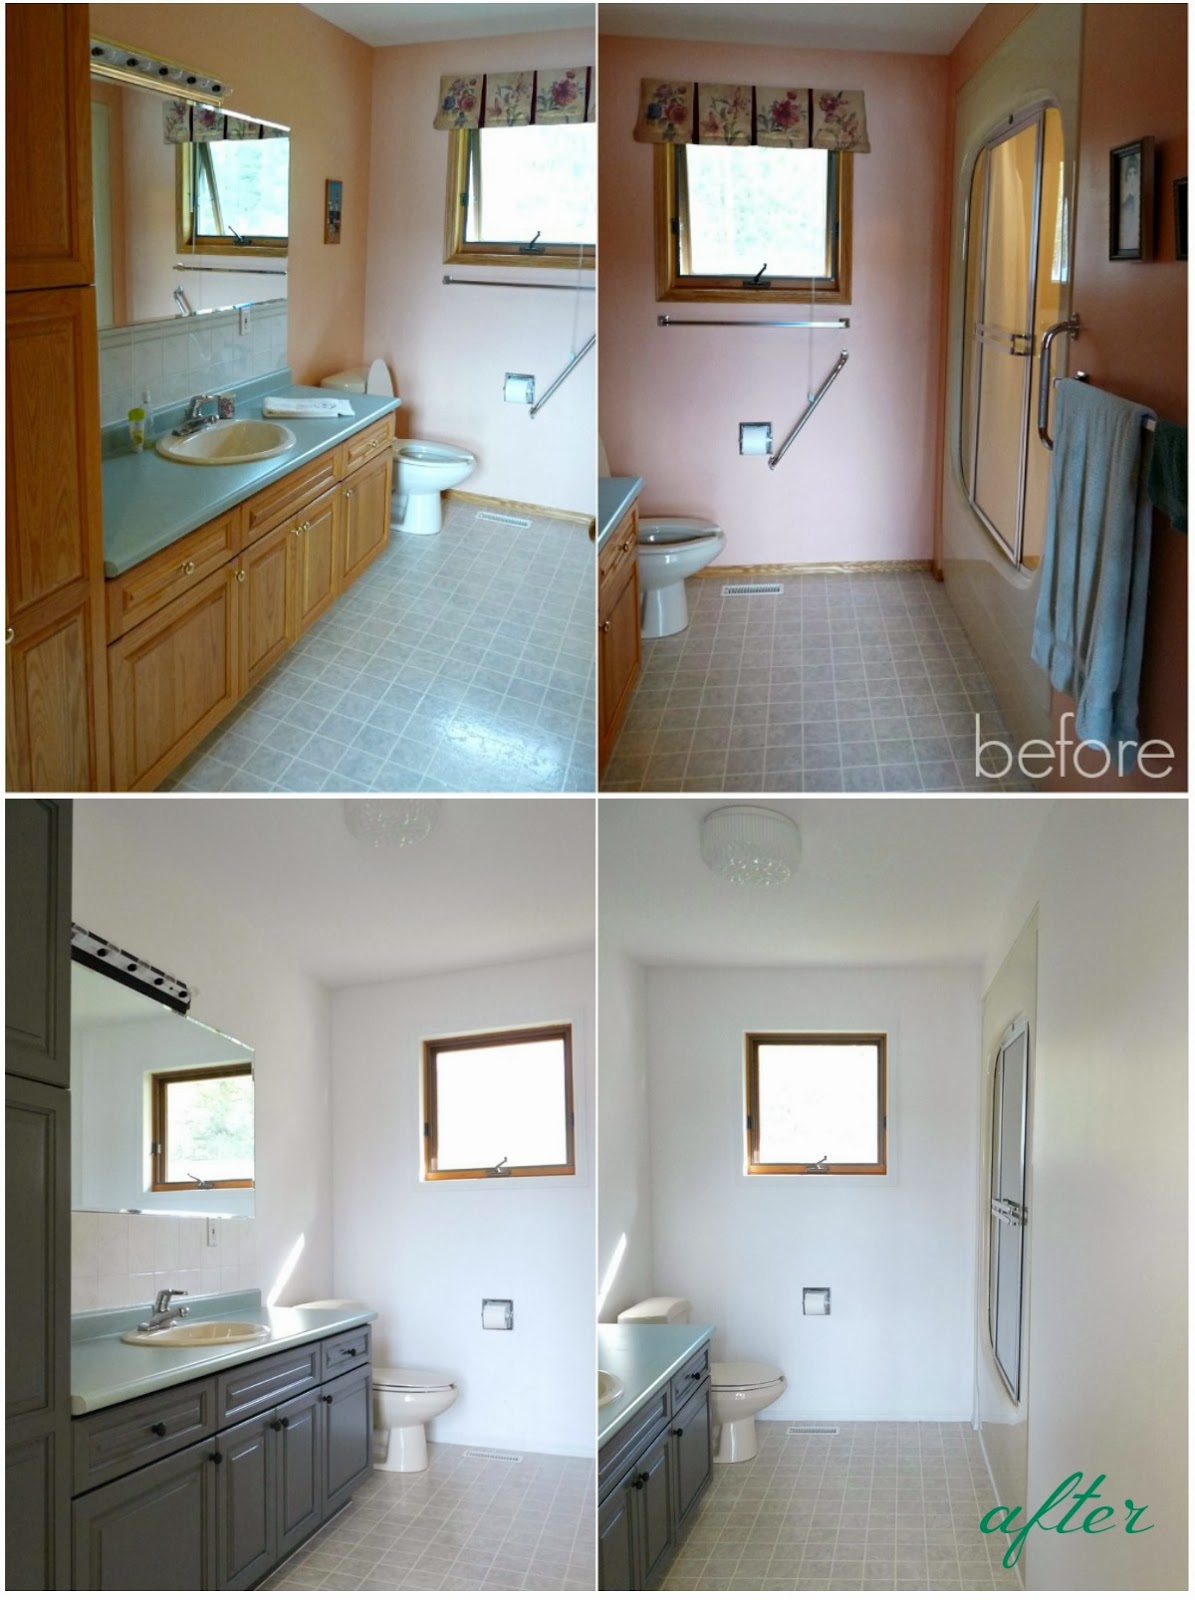
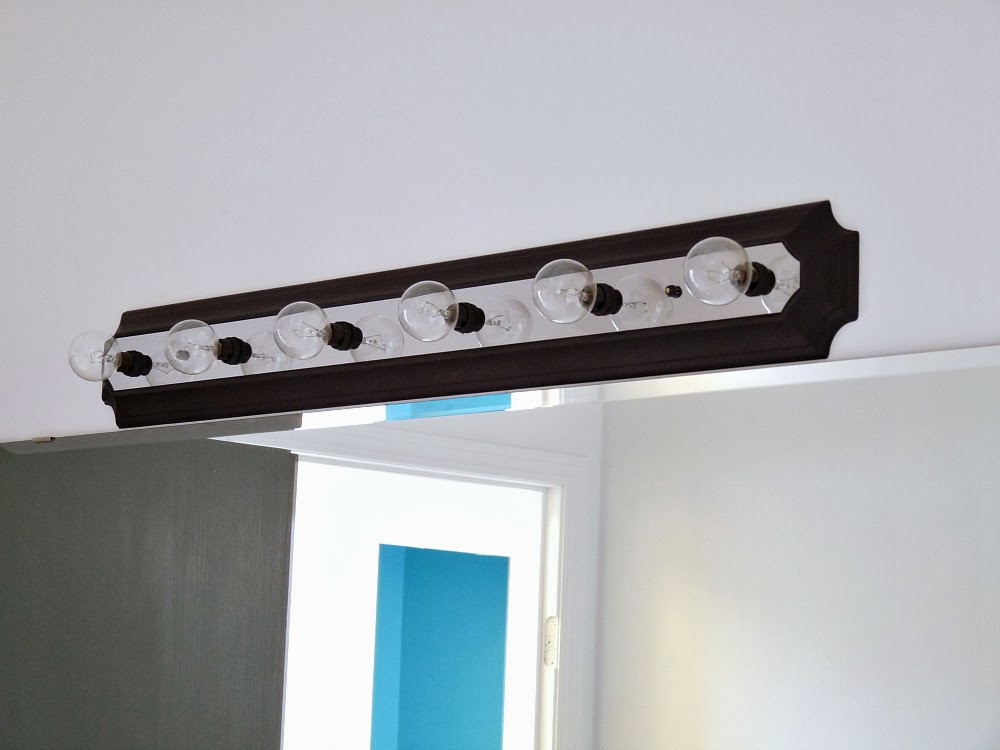
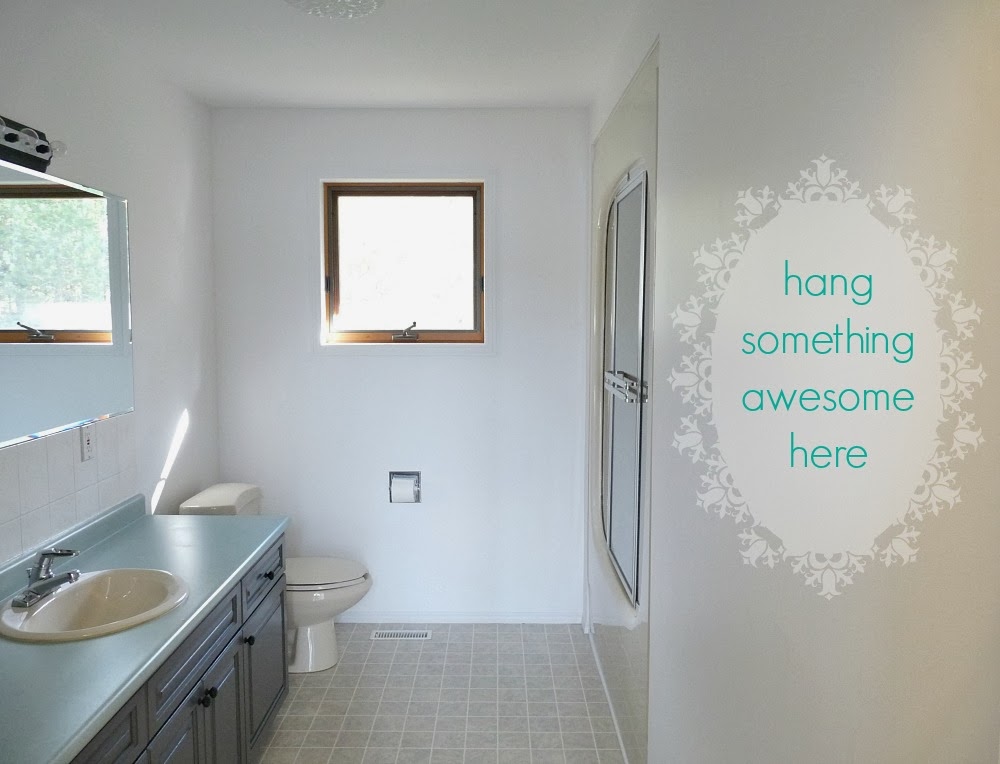
The main bathroom in the lakehouse will be the first room to be fully renovated, hopefully this summer. Other than the size (huge to me) and layout (nothing unusual), I hate everything about its original state. The oak cabinet doors and trim were woodsy and the vanity uncomfortably low, the gold knobs just bugged me, the pink walls were criticized by everyone who came through (and they just weren't "us"), the light fixtures were utilitarian and dated, and don't even get me started on the beige tub, sink, and portal shower. (Actually, the portal has been great for bathing Szuka, who has become a master escape artist dodging to the left or right and leaping out of the tub with surprising agility. Unlike the townhouse tub, the space portal blocks her exits, allowing me to wash her without getting kicked in the head by her giant puppy paws).
![]()
Even though we hope to reno soonish, I wanted to spruce up the room a little but wanted to spend very little in the process because every dime I spend in here takes a dime away from our dream bathroom.
![]()
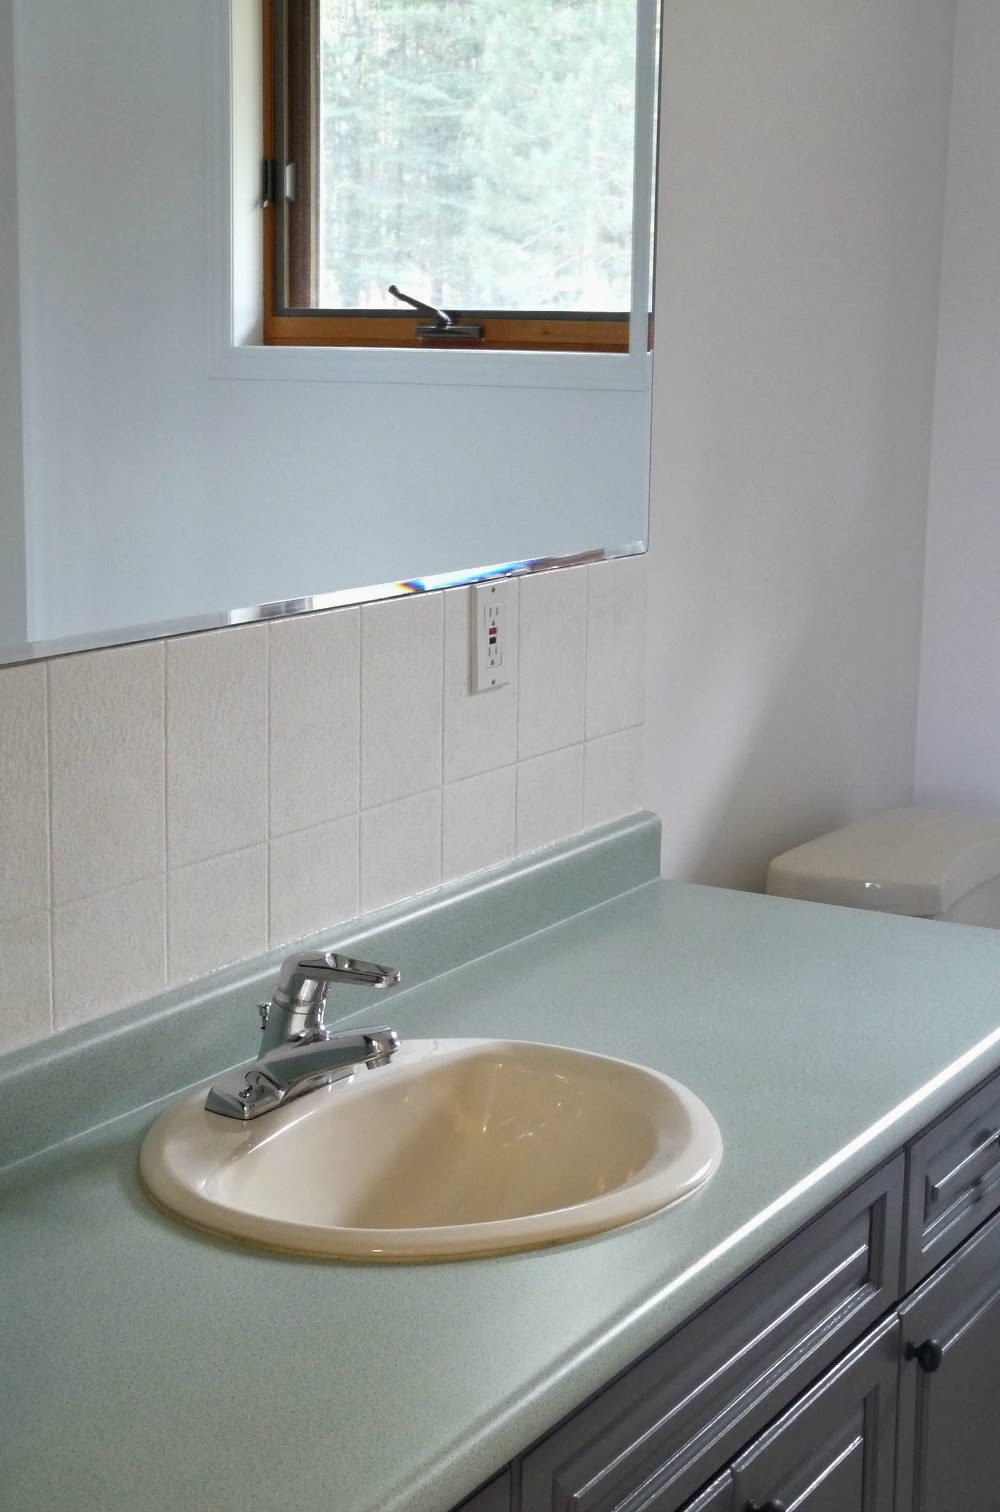
There is such a small amount of tile (just between the mirror and vanity) that I contemplated just picking up some leftovers at Habitat for Humanity and redoing it. But I've tiled before and, although it's not terribly tricky, it can be time consuming. I really yearned for something quick and painless as well as thrifty and thought this bathroom would be the perfect place to experiment a little with a different kind of DIY solution, so I approached Rustoleum about trying their Tile Transformations Kit. I opted for the Solid Colour Textured Finish, but they sent me the Natural Stone Finish also, which worked in my favour.
![]()
![]()
The first few steps were easy: remove the caulking around the tile and clean it thoroughly with the magic scrubbing powder provided. Then I taped off the area and protected the surfaces with drop cloths.
![]()
![]()
The next morning I arrived at the lakehouse to see the sags had remained. I contemplated sanding and starting over, or just ripping it out and replacing the tile after all, but I figured I had nothing to lose so I added the step for the Natural Stone finish. It's basically a transparent, grey-tinted coating with flecks and glittery bits that is layered on top of the Solid Colour Textured Finish. It is supposed to dry clear, but it tinted the original colour, dulling it a bit, which was a-okay by me but different than what the instructional video suggests. I rolled that on without any trouble, hoping it would hide my goof.
![]()
![]()
Once it dried, it looked better! The finish hides the sags a little because it has some sparkle and texture, and because it's meant to look like stone, a little irregularity actually helps the rouse along. Crisis averted!!
![]()
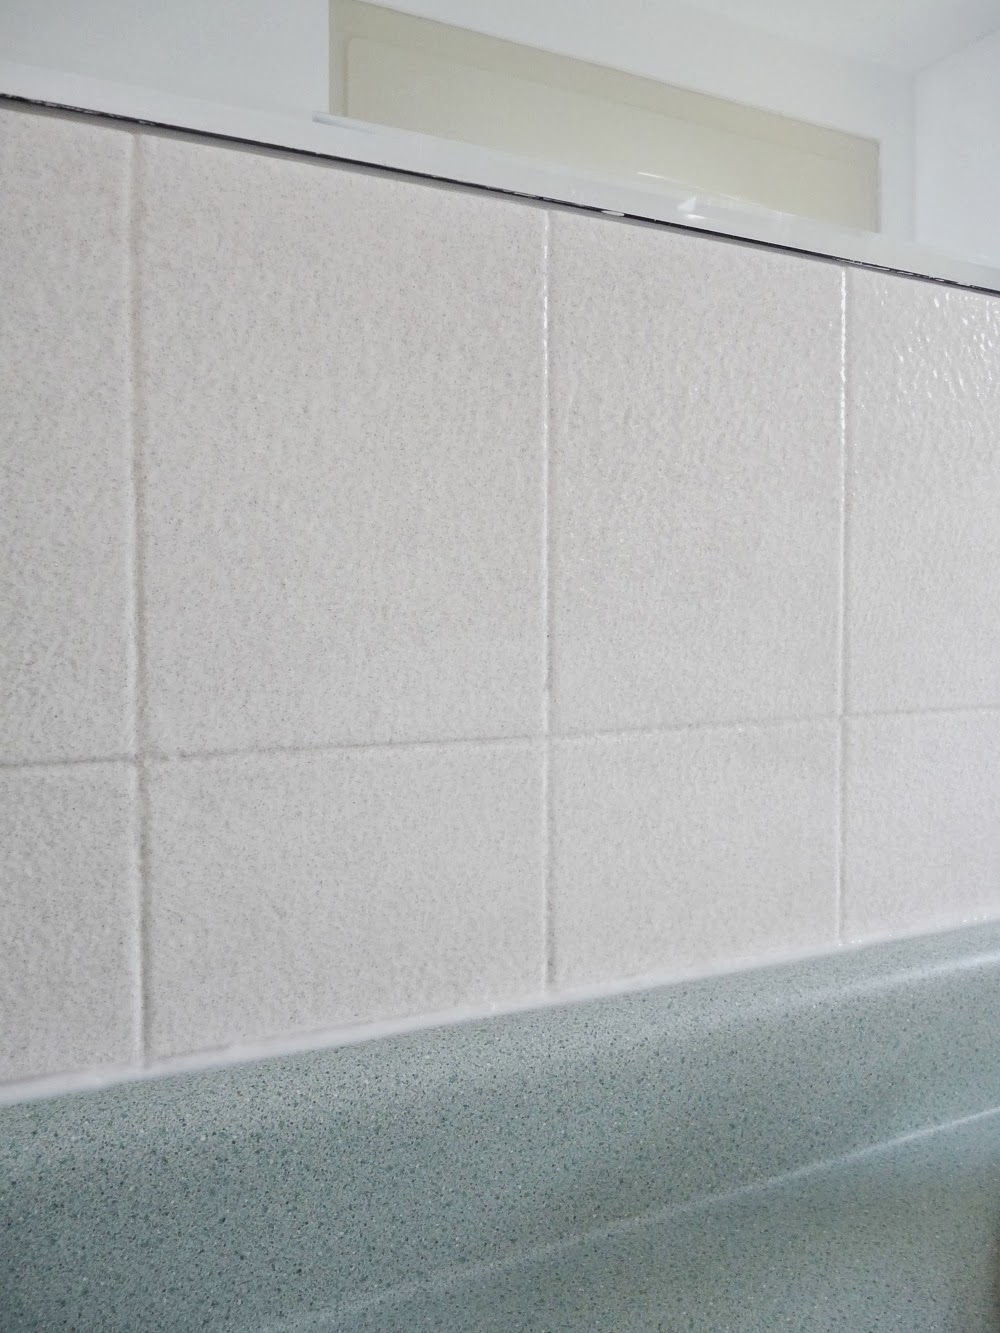
Here's a closer look at the finish:
![]()
In real life, the flaws are much less noticeable (I tried really hard to photograph it so you could see the texture I accidentally created). Also, although it has a textured finish, to the touch the texture is smooth, not rough, so cleaning should be a breeze. I wouldn't use this finish in a space I'm putting money into because without the grout lines it's obviously not real stone, but at a glance it looks refreshed - it's a perfect cheap and easy, temporary fix. The tile is now plain and simple - definitely an improvement on the 80s tile design lurking beneath, and all done for only a couple of minutes of work. Seriously, painting this tile and the half bathroom tile, both steps, took less than half an hour total (over two days), including prep and clean up.
![]()
![]()
I am confident that the problem here was a user error. The instructions indicate the paint must be used within 7 days of tinting and I was just barely passed this timeline but didn't think a few days would make a difference. Because this paint hardens to an amazingly durable finish (definitely NOT the same as just priming and painting, this special coating acts and feels like real ceramic), I think it started to cure in the can and by the time I applied it, it was a little too firm to use. Lesson learned: follow the instructions to the letter. Even with the snag, the bathroom is coming along nicely and I can't wait to show you the (problem-free) makeover of the cabinetry next. So long yellowy oak!
I partnered with Rustoleum for this project and although I was provided the product, I was not encouraged to provide a positive review. Having diagnosed my error, I would happily try this product again because it was straight-forward and is a fabulous quick-fix for dated tile. If you decide to try this product, be sure to follow the instructions carefully, and check out this video tutorial for more help.

Even though we hope to reno soonish, I wanted to spruce up the room a little but wanted to spend very little in the process because every dime I spend in here takes a dime away from our dream bathroom.

There is such a small amount of tile (just between the mirror and vanity) that I contemplated just picking up some leftovers at Habitat for Humanity and redoing it. But I've tiled before and, although it's not terribly tricky, it can be time consuming. I really yearned for something quick and painless as well as thrifty and thought this bathroom would be the perfect place to experiment a little with a different kind of DIY solution, so I approached Rustoleum about trying their Tile Transformations Kit. I opted for the Solid Colour Textured Finish, but they sent me the Natural Stone Finish also, which worked in my favour.

The first few steps were easy: remove the caulking around the tile and clean it thoroughly with the magic scrubbing powder provided. Then I taped off the area and protected the surfaces with drop cloths.


The next morning I arrived at the lakehouse to see the sags had remained. I contemplated sanding and starting over, or just ripping it out and replacing the tile after all, but I figured I had nothing to lose so I added the step for the Natural Stone finish. It's basically a transparent, grey-tinted coating with flecks and glittery bits that is layered on top of the Solid Colour Textured Finish. It is supposed to dry clear, but it tinted the original colour, dulling it a bit, which was a-okay by me but different than what the instructional video suggests. I rolled that on without any trouble, hoping it would hide my goof.
Once it dried, it looked better! The finish hides the sags a little because it has some sparkle and texture, and because it's meant to look like stone, a little irregularity actually helps the rouse along. Crisis averted!!
Here's a closer look at the finish:
In real life, the flaws are much less noticeable (I tried really hard to photograph it so you could see the texture I accidentally created). Also, although it has a textured finish, to the touch the texture is smooth, not rough, so cleaning should be a breeze. I wouldn't use this finish in a space I'm putting money into because without the grout lines it's obviously not real stone, but at a glance it looks refreshed - it's a perfect cheap and easy, temporary fix. The tile is now plain and simple - definitely an improvement on the 80s tile design lurking beneath, and all done for only a couple of minutes of work. Seriously, painting this tile and the half bathroom tile, both steps, took less than half an hour total (over two days), including prep and clean up.

I am confident that the problem here was a user error. The instructions indicate the paint must be used within 7 days of tinting and I was just barely passed this timeline but didn't think a few days would make a difference. Because this paint hardens to an amazingly durable finish (definitely NOT the same as just priming and painting, this special coating acts and feels like real ceramic), I think it started to cure in the can and by the time I applied it, it was a little too firm to use. Lesson learned: follow the instructions to the letter. Even with the snag, the bathroom is coming along nicely and I can't wait to show you the (problem-free) makeover of the cabinetry next. So long yellowy oak!
I partnered with Rustoleum for this project and although I was provided the product, I was not encouraged to provide a positive review. Having diagnosed my error, I would happily try this product again because it was straight-forward and is a fabulous quick-fix for dated tile. If you decide to try this product, be sure to follow the instructions carefully, and check out this video tutorial for more help.